VMware Dynamic Environment Manager (DEM) configuration
VMware Dynamic Environment Manager (DEM) is a tool designed to manage user’s profiles in a VMware Horizon environment.
This tool allows to retain both customizations and files saved by the logged user to the entitled VD and store them in a File Server.
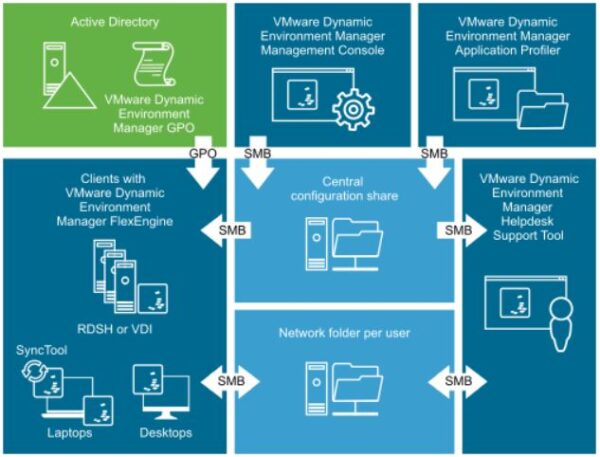
Install the Dynamic Environment Manager Console
From VMware website download the latest version of Dynamic Environment Manager. Copy the DEM installation file to a VM available in your network, also the Connection Server is fine since the application is just an editor that saves info to the File Server.
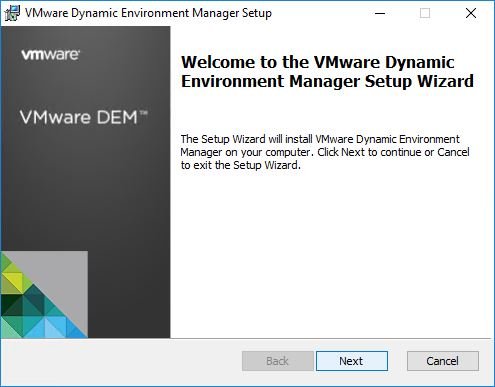
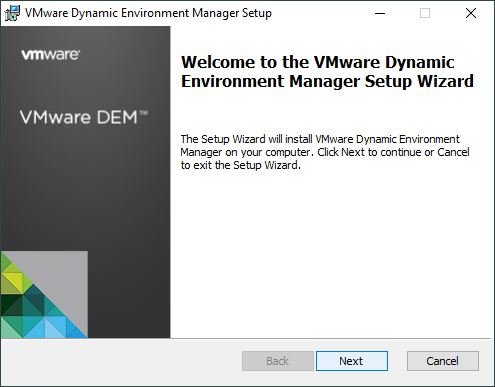
Run the installer and click Next.
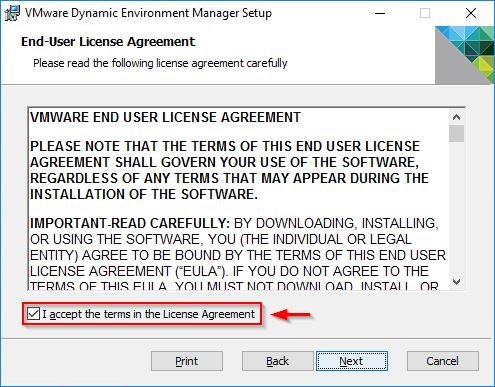
Accept the EULA and click Next.
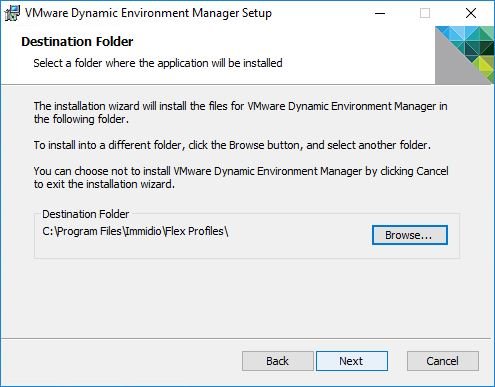
Leave default location and click Next.
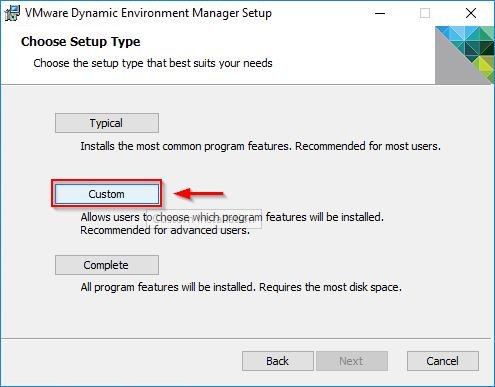
Choose Custom setup type.
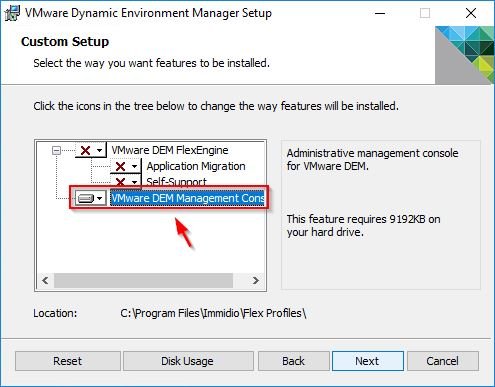
Disable the DEM FlexEngine installation and enable the DEM Management Console only. Click Next.
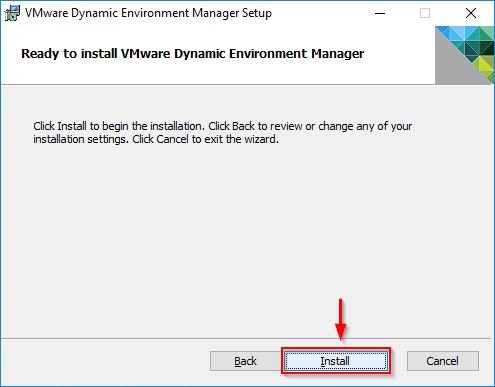
Click Install to proceed with the installation.
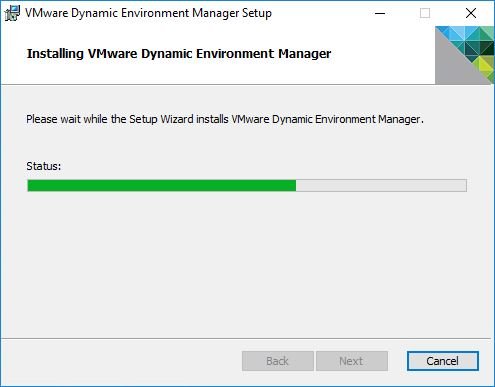
DEM Management Console is being installed.
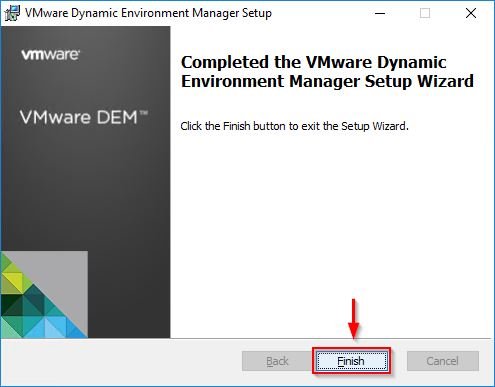
When the installation has been completed, click Finish to exit the wizard.
Install the DEM FlexEngine
Open the master image used to generate clones and paste the DEM installer. Double click the file to run the installation wizard and click Next.
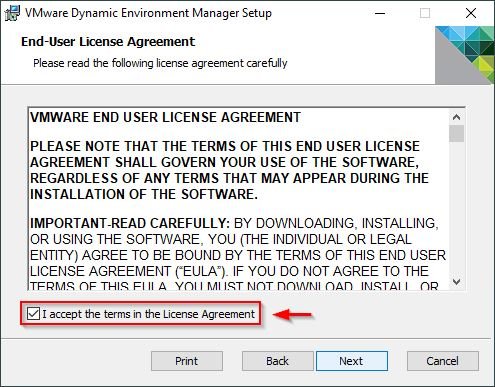
Accept the EULA and click Next.
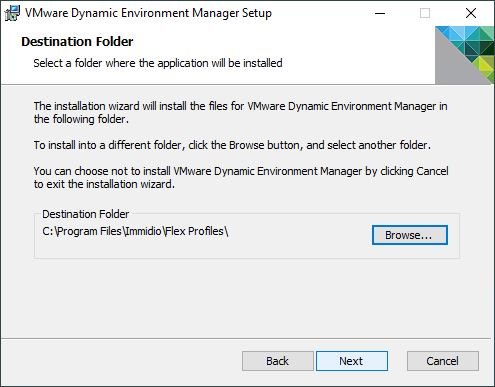
Leave default location and click Next.
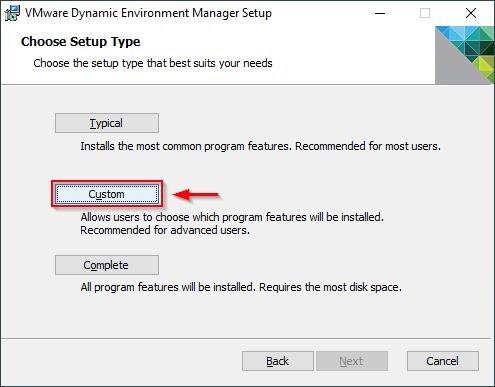
Choose Custom setup type.
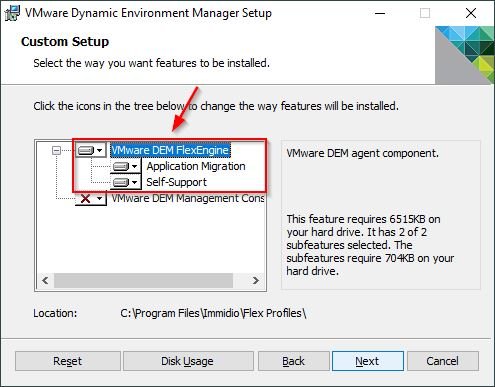
Make sure DEM FlexEngine installation is enable and the DEM Management Console disabled. Click Next.
Click Next.
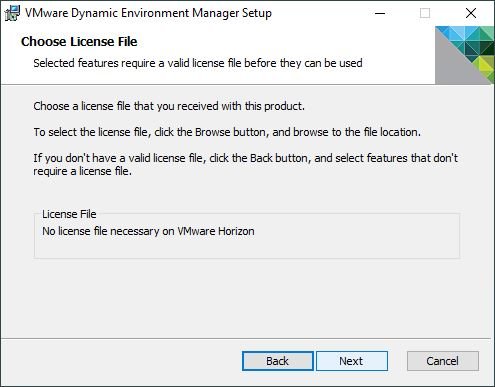
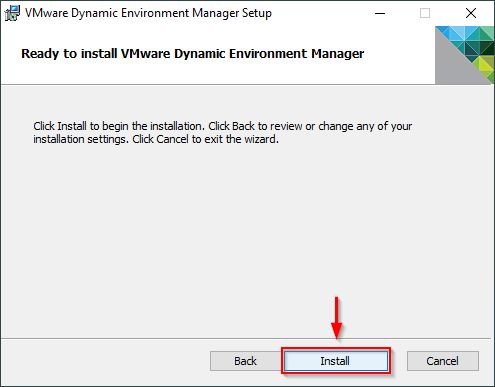
Click Install to proceed with installation.
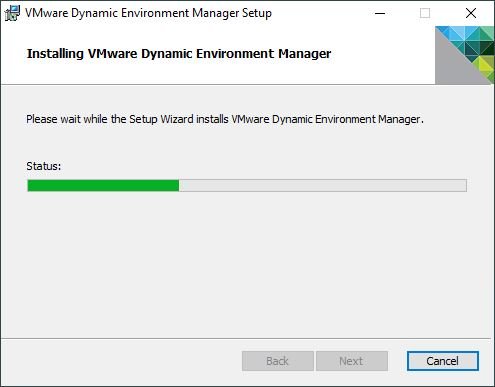
DEM Management Console is being installed.
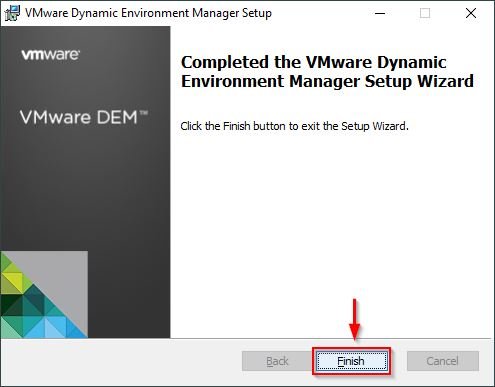
When the installation has been completed, click Finish to exit the wizard.
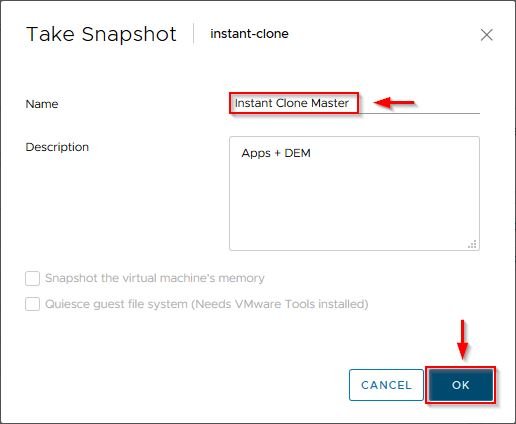
Take the snapshot of the master image to use with clones. Enter a Name then click OK.
Configure File Server shares
Since DEM needs to save some configuration files to a File Server, you need to configure some folders and shares granting the correct permissions.
The following permissions must be granted to the required folders:
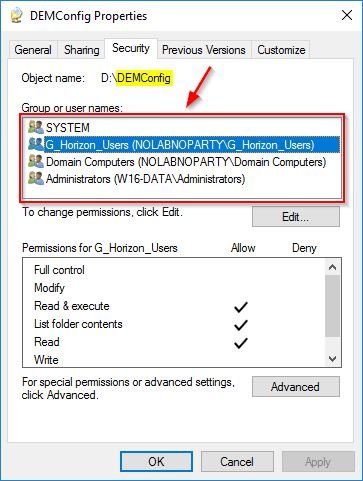
DEMConfig folder
Share
- Administrators > Full
- Everyone > Change
Security
- Administrators > Full > This folder, subfolders and files
- G_Horizon_Users > Read & execute > This folder, subfolders and files
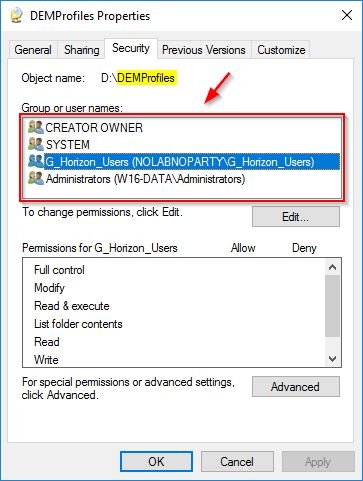
DEMProfiles folder
Share
- Administrators > Full
- Everyone > change
Security
- Administrators > Full > This folder, subfolders and files
- G_Horizon_Users > Create folders / append data > This folder only
- CREATOR OWNER > Full > Subfolders and files only
Configure DEM
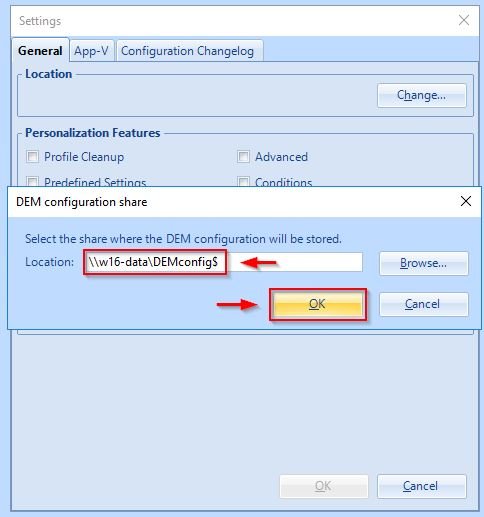
When the tool runs for the first time, you need to specify the location to store the DEM configuration files.
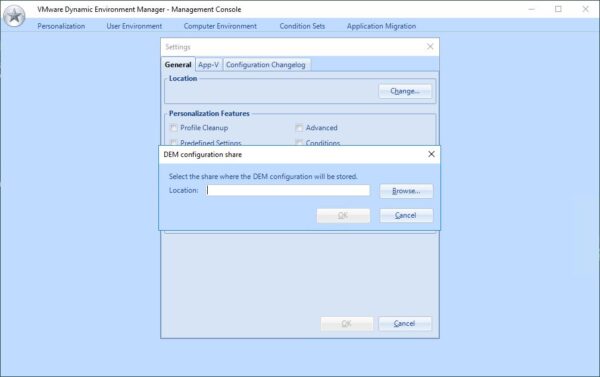
Enter the path to the previously created folder and click OK.
\<File_Server>DEMconfig$
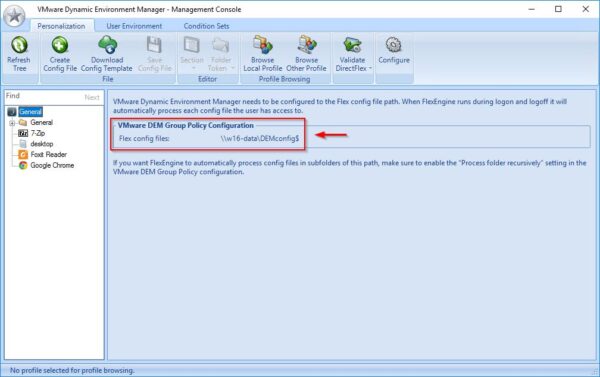
The location for the configuration files has been set.
Configure Applications
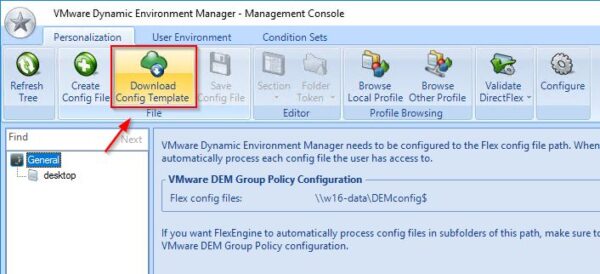
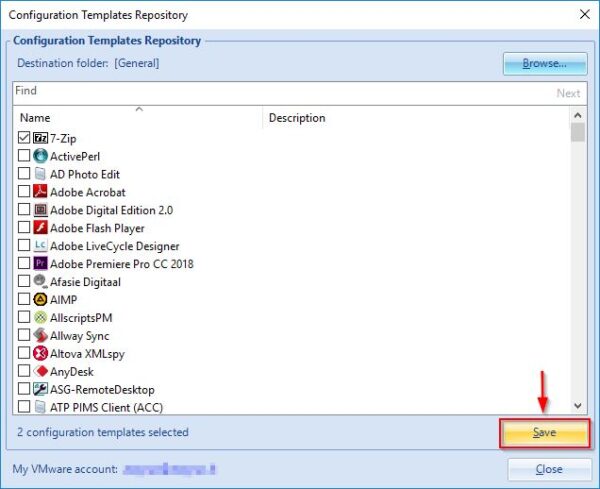
Click Download Config Template to download the templates you can use for some common applications.
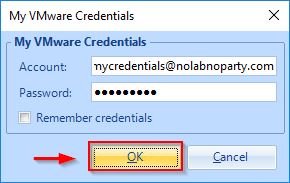
Enter the credentials for the My VMware Credentials and click OK.
Templates are being downloaded.

Specify installed applications to use from the list and click Save then Close.
The applications selected for the clones.
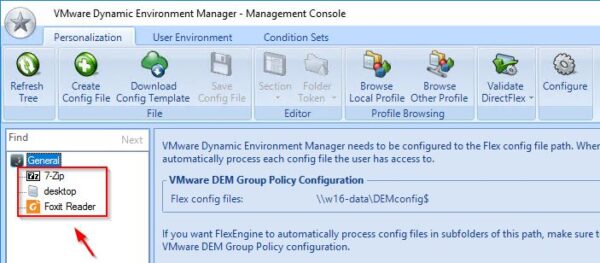
To define the user environment for the VDs, you need to access the appropriated section in DEM and configure the requested features accordingly.
Map Drives
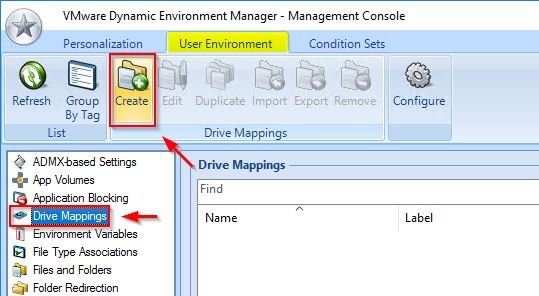
Go to the User Environment tab and select Drive Mappings item to specify the location where the users will store their files. Click Create.
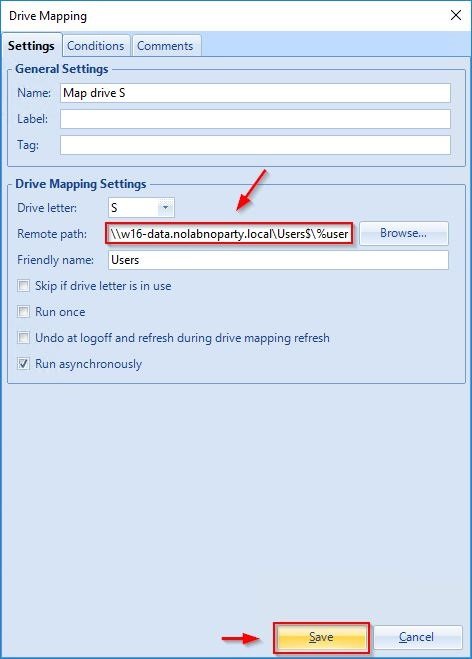
Specify Name, Drive letter, Remote path (the path to the used File Server, in the example \w16-data.nolabnoparty.localUsers$%username%), and a Friendly name for the drive. Click Save.
Folder Redirection
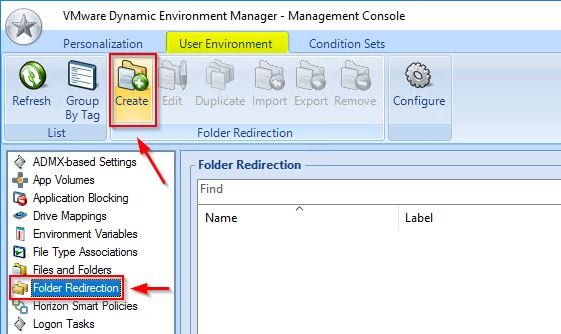
Select Folder Redirection and click Create.
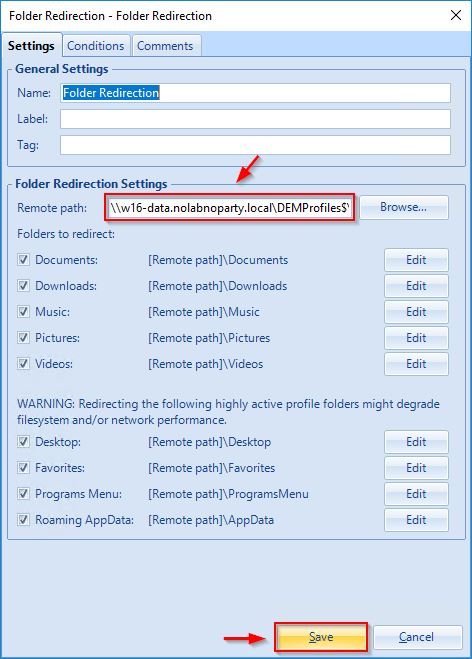
Specify Name, Remote path (the path to the used File Server, in the example \w16-data.nolabnoparty.localDEMProfiles$%username%) and select the folders you need to redirect. Click Save.
Create Shortcuts
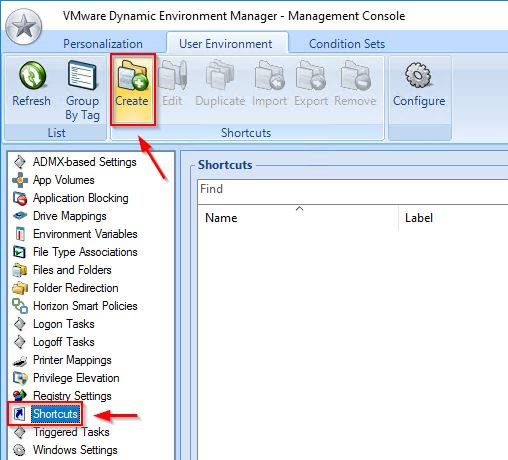
Select Shortcuts and click Create.
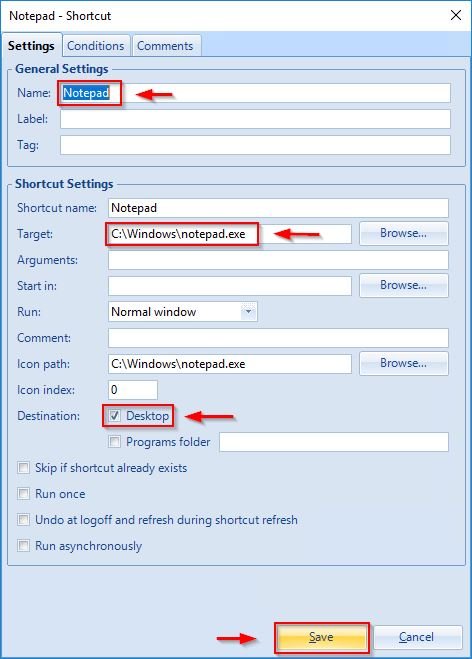
Specify Name, Target, and Destination then click Save.
Configure GPO in AD
To inject the configuration to clones you need to create a GPO in Active Directory and link to the appropriate OU. To create the GPO you need to first import the ADMX template in your Active Directory located inside the DEM application .ZIP file.
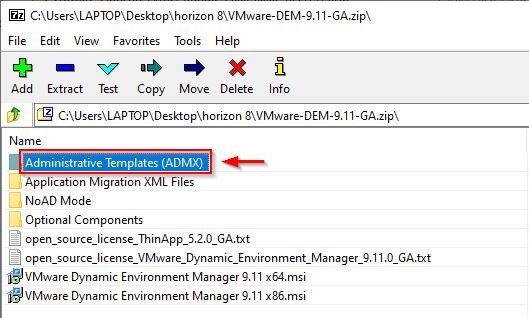
Extract the Administrative Templates (ADMX) folder from the .ZIP file and copy it to your Domain Controller.
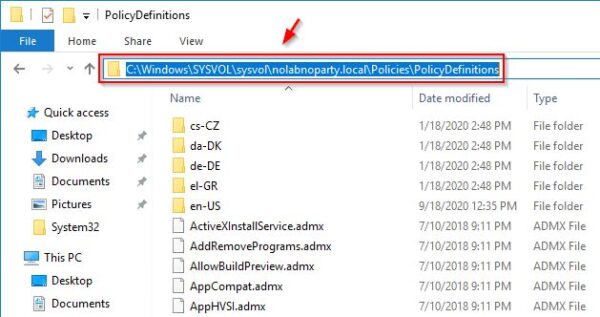
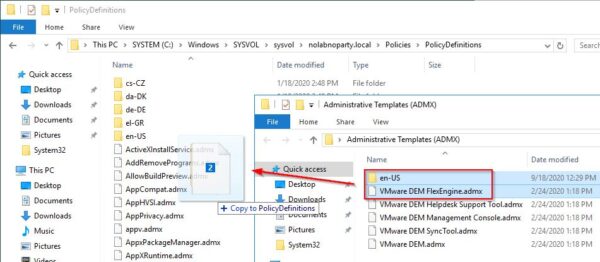
Select the folder en-US and the VMware DEM FlexEngine-admx. Copy the selected items to the folder C:WindowsSYSVOLsysvol<domain>PoliciesPolicyDefinitions in your Domain Controller.
C:WindowsSYSVOLsysvolnolabnoparty.localPoliciesPolicyDefinitions
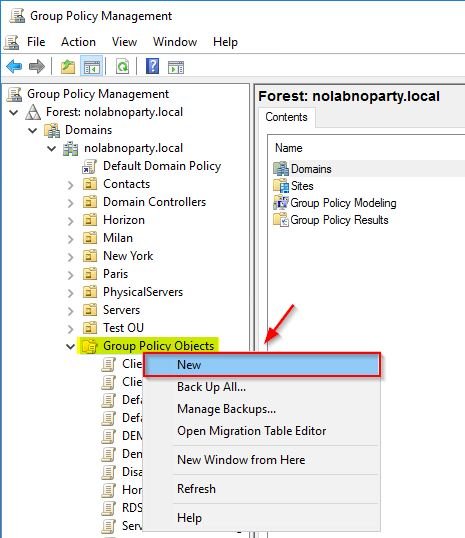
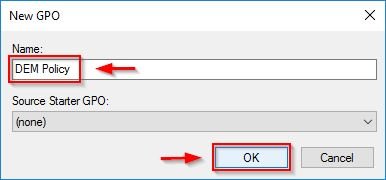
Now open the Group Policy Management and right click Group Policy Objects. Select New to create a new GPO.
Enter a Name for the GPO and click OK.
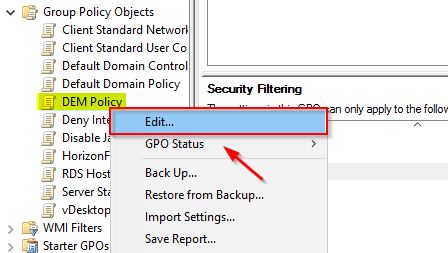
Right click the created GPO and select Edit.
Computer Configuration
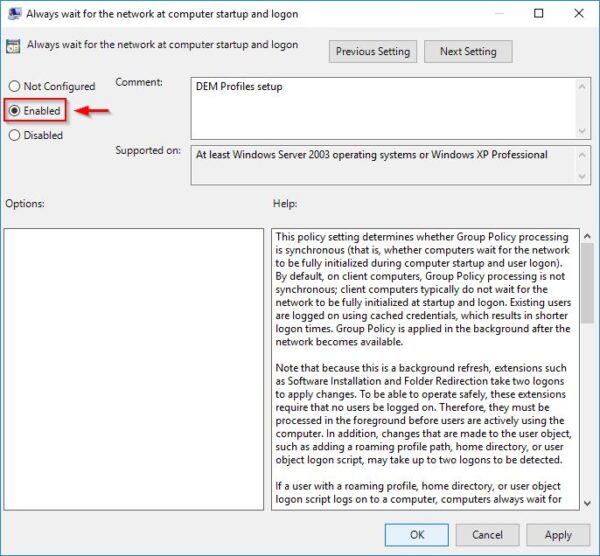
Go to Policies > Administrative Templates > System > Logon and configure the following policies:
- Always wait for the network at computer startup and logon: Enabled
User Configuration
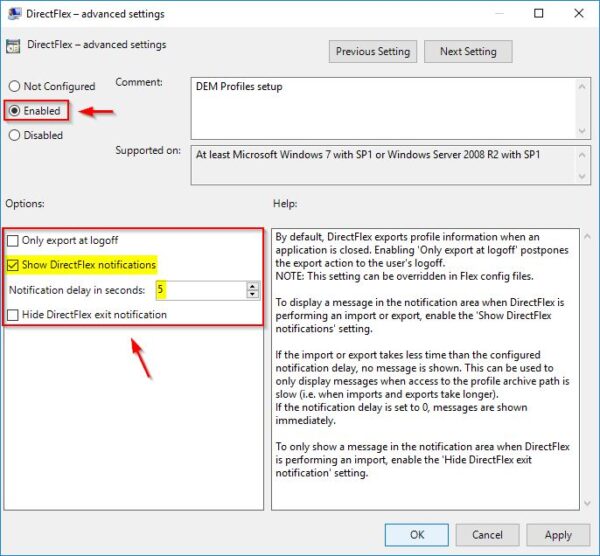
Go to Policies/Administrative Templates/FlexEngine and configure the following policies:
- DirectFlex – advanced settings: Enabled
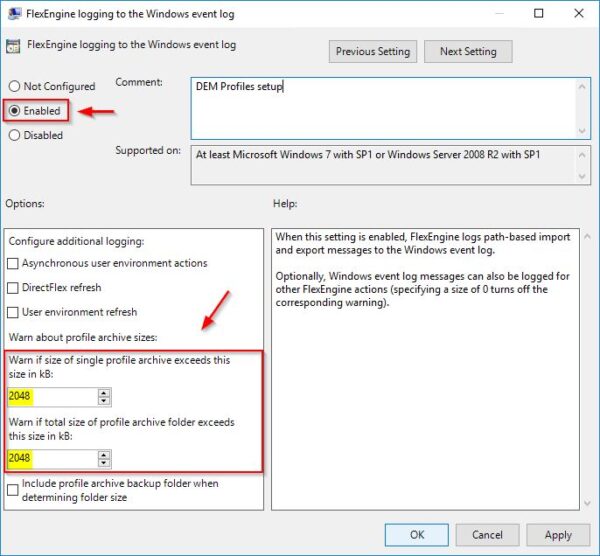
- FlexEngine logging to the Windows event log: Enabled
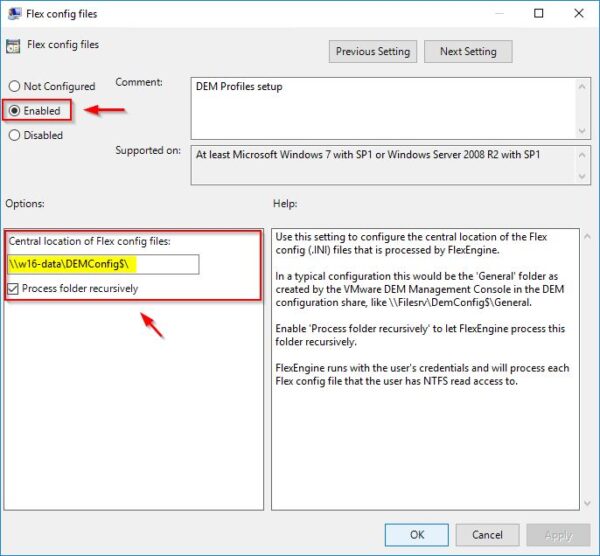
- Flex config files: Enabled – specify the path to the DEMConfig share previously created.
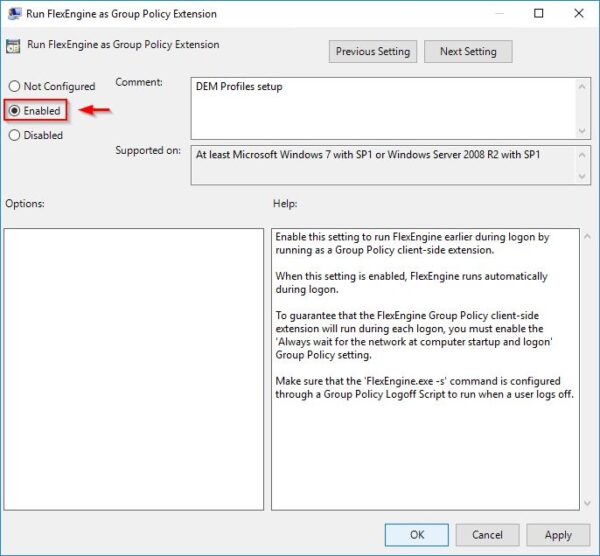
- Run FlexEngine as Group Policy Extension: Enabled
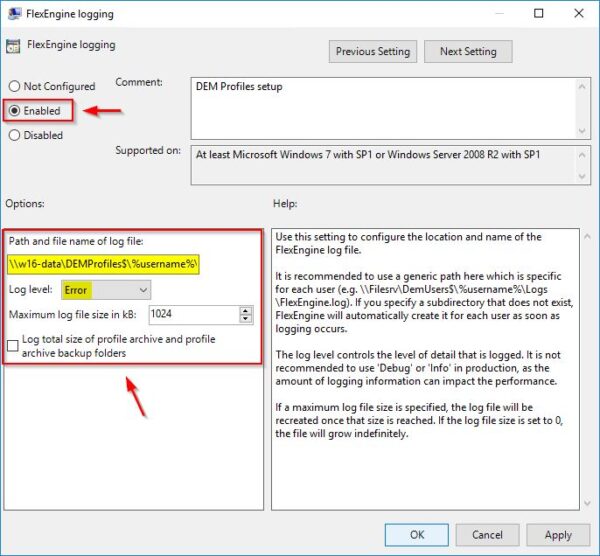
- FlexEngine logging: Enabled – specify the path to the File Server and filename of the log file (\w16-dataDEMProfiles$%username%LogsFlexEngine.log). Select the desired Log level.
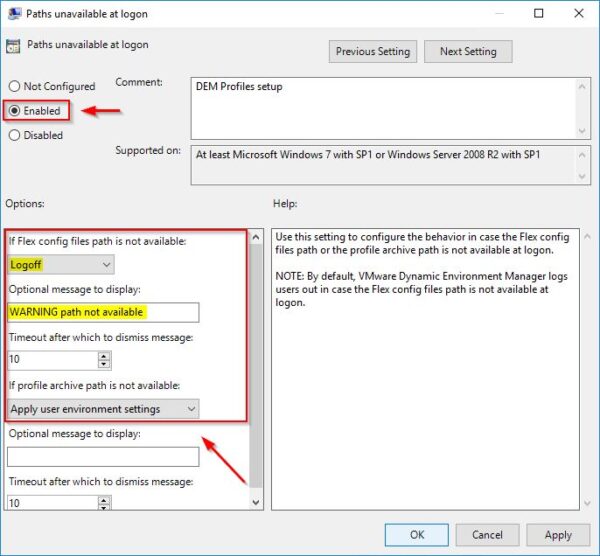
- Paths unavailable at logon: Enabled
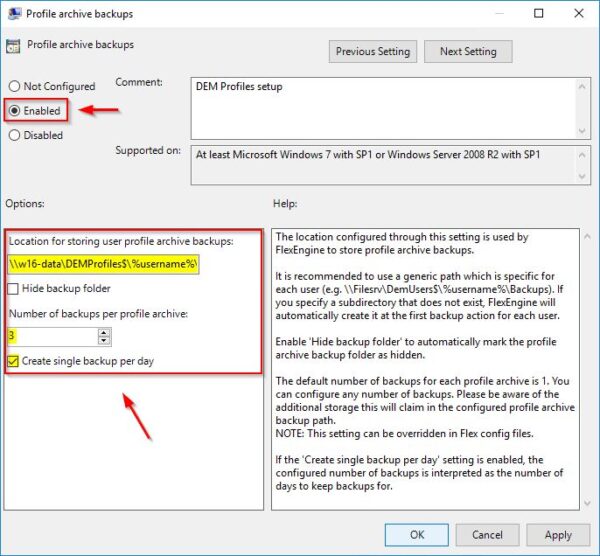
- Profile archive backups: Enabled – specify the location of the File Server to store profile backups (\w16-dataDEMProfiles$%username%Backups) and specify the retention.
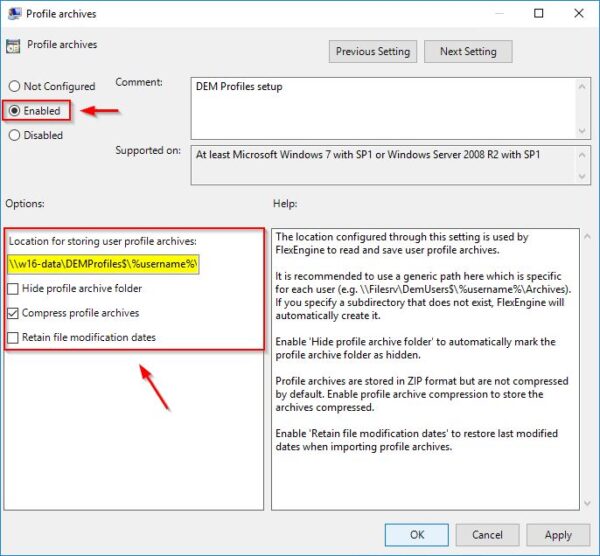
- Profile archives: Enabled – specify the location to store profiles archives in your File Server (\w16-dataDEMProfiles$%username%Archives).
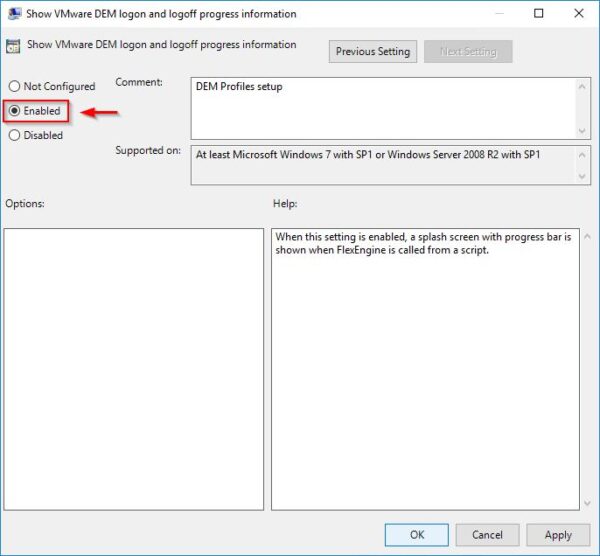
- Show VMware DEM logon and logoff progress information: Enabled
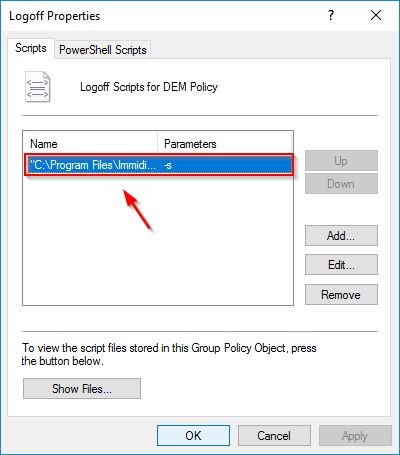
Go to Policies > Windows Settings > Scripts (Logon/Logoff):
- Logoff – enter the following parameters:
Script Name: “C:Program FilesImmidioFlex ProfilesFlexEngine.exe”
Script Parameters: -s
Apply the GPO
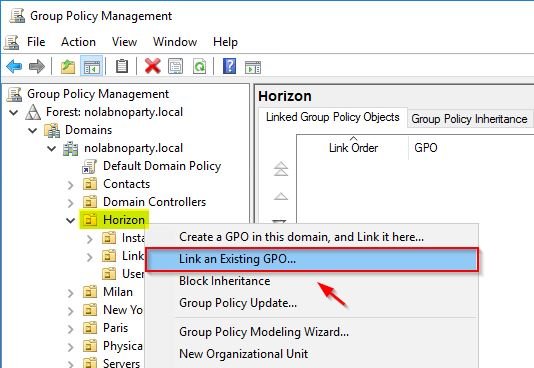
Right click the OU to link the created GPO and select Link an Existing GPO.
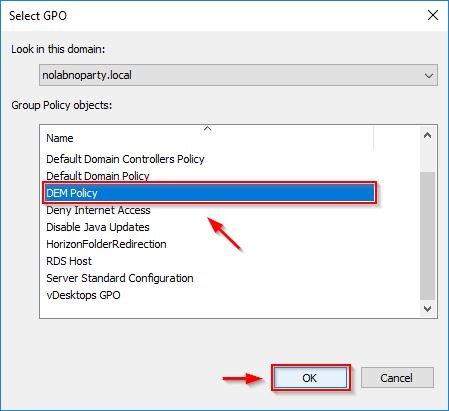
Select the GPO to use and click OK.
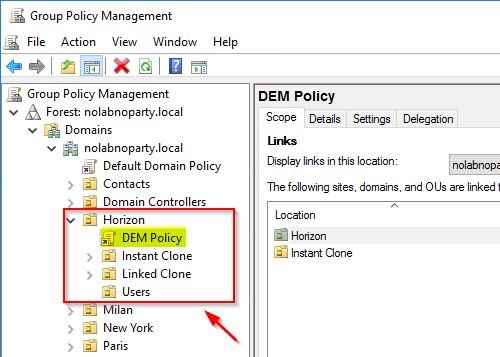
The GPO has been linked to the selected OU. For the GPO to work, make sure the GPO is linked to the OU where Horizon Users are placed.
Test user’s profile with DEM
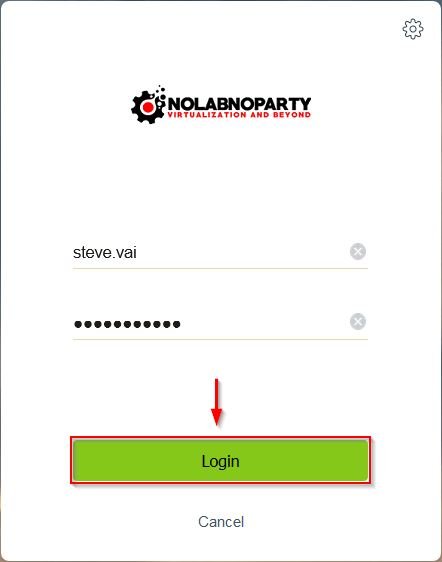
Access your Horizon infrastructure and Login with an entitled user.
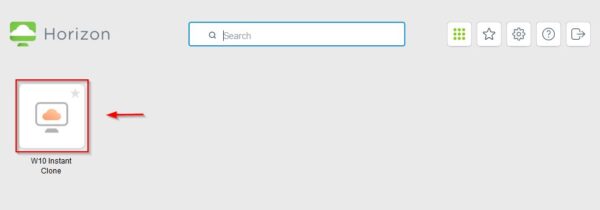
Click the entitled Pool to access the VD.
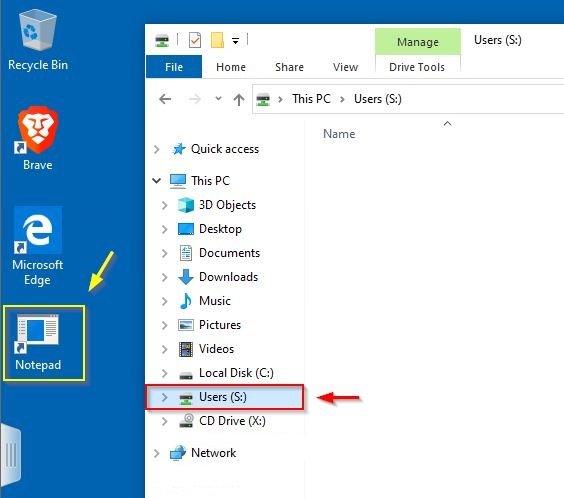
When the login process completes, you will find all the items configured in DEM:
- Notepad shortcut on the Desktop
- Mapped drive S:
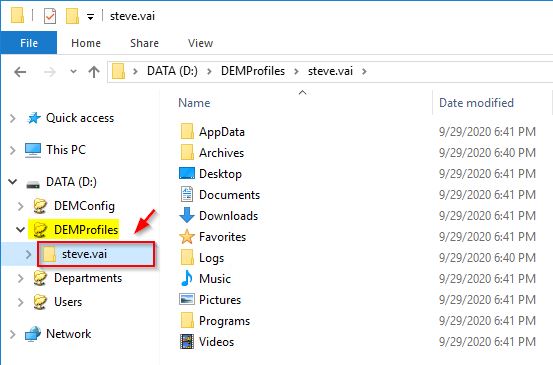
Customizations and files saved by the logged user will be stored in the corrisponding user’s profile in the File Server.
With VMware Dynamic Environment Manager the management of user’s profiles is more much easier and offers several options to customize the user environment.


