Written by Richard Hughes and Christian F.K. Schaller
This blog post is based on a white paper style writeup Richard and I did a few years ago, since I noticed this week there wasn’t any other comprehensive writeup online on the topic of how to add the required metadata to get an application to appear in GNOME Software (or any other major open source appstore) online I decided to turn the writeup into a blog post, hopefully useful to the wider community. I tried to clean it up a bit as I converted it from the old white paper, so hopefully all information in here is valid as of this posting.
Abstract
Traditionally we have had little information about Linux applications before they have been installed. With the creation of a software center we require access to rich set of metadata about an application before it is deployed so it it can be displayed to the user and easily installed. This document is meant to be a guide for developers who wish to get their software appearing in the Software stores in Fedora Workstation and other distributions. Without the metadata described in this document your application is likely to go undiscovered by many or most linux users, but by reading this document you should be able to relatively quickly prepare you application.
Introduction
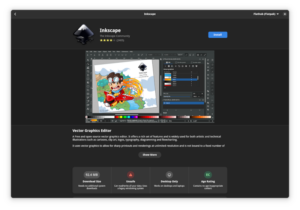
Installing applications on Linux has traditionally involved copying binary and data files into a directory and just writing a single desktop file into a per-user or per-system directory so that it shows up in the desktop environment. In this document we refer to applications as graphical programs, rather than other system add-on components like drivers and codecs. This document will explain why the extra metadata is required and what is required for an application to be visible in the software center. We will try to document how to do this regardless of if you choose to package your application as a rpm package or as a flatpak bundle. The current rules is a combination of various standards that have evolved over the years and will will try to summarize and explain them here, going from bottom to top.
System Architecture
Linux File Hierarchy
Traditionally applications on Linux are expected to install binary files to /usr/bin, the install architecture independent data files to /usr/share/ and configuration files to /etc. If you want to package your application as a flatpak the prefix used will be /app so it is critical for applications to respect the prefix setting. Small temporary files can be stored in /tmp and much larger files in /var/tmp. Per-user configuration is either stored in the users home directory (in ~/.config) or stored in a binary settings store such as dconf. As an application developer never hardcode these paths, but set them following the XDG standard so that they relocate correctly inside a Flatpak.
Desktop files
Desktop files have been around for a long while now and are used by almost all Linux desktops to provide the basic description of a desktop application that your desktop environment will display. Like a human readable name and an icon.
So the creation of a desktop file on Linux allows a program to be visible to the graphical environment, e.g. KDE or GNOME Shell. If applications do not have a desktop file they must be manually launched using a terminal emulator. Desktop files must adhere to the Desktop File Specification and provide metadata in an ini-style format such as:
- Binary type, typically ‘Application’
- Program name (optionally localized)
- Icon to use in the desktop shell
- Program binary name to use for launching
- Any mime types that can be opened by the applications (optional)
- The standard categories the application should be included in (optional)
- Keywords (optional, and optionally localized)
- Short one-line summary (optional, and optionally localized)
The desktop file should be installed into /usr/share/applications for applications that are installed system wide. An example desktop file provided below:
[Desktop Entry]
Type=Application
Name=OpenSCAD
Icon=openscad
Exec=openscad %f
MimeType=application/x-openscad;
Categories=Graphics;3DGraphics;Engineering;
Keywords=3d;solid;geometry;csg;model;stl;
The desktop files are used when creating the software center metadata, and so you should verify that you ship a .desktop file for each built application, and that these keys exist: Name, Comment, Icon, Categories, Keywords and Exec and that desktop-file-validate correctly validates the file. There should also be only one desktop file for each application.
The application icon should be in the PNG format with a transparent background and installed in/usr/share/icons,/usr/share/icons/hicolor//apps/, or /usr/share/${app_name}/icons/*. The icon should be at least 128×128 in size (as this is the minimum size required by Flathub).
The file name of the desktop file is also very important, as this is the assigned ‘application ID’. New applications typically use a reverse-DNS style, e.g. org.gnome.Nautilus would be the app-id. And the .desktop entry file should thus be name org.gnome.Nautilus.desktop, but older programs may just use a short name, e.g. gimp.desktop. It is important to note that the file extension is also included as part of the desktop ID.
You can verify your desktop file using the command ‘desktop-file-validate’. You just run it like this:
desktop-file-validate myapp.desktop
This tools is available through the desktop-file-utils package, which you can install on Fedora Workstation using this command
dnf install desktop-file-utils
You also need what is called a metainfo file (previously known as AppData file= file with the suffix .metainfo.xml (some applications still use the older .appdata.xml name) file should be installed into /usr/share/metainfo with a name that matches the name of the .desktop file, e.g. gimp.desktop & gimp.metainfo.xml or org.gnome.Nautilus.desktop & org.gnome.Nautilus.metainfo.xml.
In the metainfo file you should include several 16:9 aspect screenshots along with a compelling translated description made up of multiple paragraphs.
In order to make it easier for you to do screenshots in 16:9 format we created a small GNOME Shell extension called ‘Screenshot Window Sizer’. You can install it from the GNOME Extensions site.
Once it is installed you can resize the window of your application to 16:9 format by focusing it and pressing ‘ctrl+alt+s’ (you can press the key combo multiple times to get the correct size). It should resize your application window to a perfect 16:9 aspect ratio and let you screenshot it.
Make sure you follow the style guide, which can be tested using the appstreamcli command line tool. appstreamcli is part of the ‘appstream’ package in Fedora Workstation.:
appstreamcli validate foo.metainfo.xml
If you don’t already have the appstreamcli installed it can be installed using this command on Fedora Workstation:
dnf install appstreamWhat is allowed in an metainfo file is defined in the AppStream specification but common items typical applications add is:
- License of the upstream project in SPDX identifier format [6], or ‘Proprietary’
- A translated name and short description to show in the software center search results
- A translated long description, consisting of multiple paragraphs, itemized and ordered lists.
- A number of screenshots, with localized captions, typically in 16:9 aspect ratio
- An optional list of releases with the update details and release information.
- An optional list of kudos which tells the software center about the integration level of the
application - A set of URLs that allow the software center to provide links to help or bug information
- Content ratings and hardware compatibility
- An optional gettext or QT translation domain which allows the AppStream generator to collect statistics on shipped application translations.
A typical (albeit somewhat truncated) metainfo file is shown below:
<?xml version="1.0" encoding="UTF-8"?>
<component type="desktop-application">
<id>org.gnome.Terminal</id>
<metadata_license>GPL-3.0+ or GFDL-1.3-only</metadata_license>
<project_license>GPL-3.0+</project_license>
<name>Terminal</name>
<name xml:lang="ar">الطرفية</name>
<name xml:lang="an">Terminal</name>
<summary>Use the command line</summary>
<summary xml:lang="ar">استعمل سطر الأوامر</summary>
<summary xml:lang="an">Emplega la linia de comandos</summary>
<description>
<p>GNOME Terminal is a terminal emulator application for accessing a UNIX shell environment which can be used to run programs available on your system.</p>
<p xml:lang="ar">يدعم تشكيلات مختلفة، و الألسنة و العديد من اختصارات لوحة المفاتيح.</p>
<p xml:lang="an">Suporta quantos perfils, quantas pestanyas y implementa quantos alcorces de teclau.</p>
</description>
<recommends>
<control>console</control>
<control>keyboard</control>
<control>pointing</control>
</recommends>
<screenshots>
<screenshot type="default">https://help.gnome.org/users/gnome-terminal/stable/figures/gnome-terminal.png</screenshot>
</screenshots>
<kudos>
<kudo>HiDpiIcon</kudo>
<kudo>HighContrast</kudo>
<kudo>ModernToolkit</kudo>
<kudo>SearchProvider</kudo>
<kudo>UserDocs</kudo>
</kudos>
<content_rating type="oars-1.1"/>
<url type="homepage">https://wiki.gnome.org/Apps/Terminal</url>
<project_group>GNOME</project_group>
<update_contact>https://wiki.gnome.org/Apps/Terminal/ReportingBugs</update_contact>
</component>
Some Appstrean background
The Appstream specification is an mature and evolving standard that allows upstream applications to provide metadata such as localized descriptions, screenshots, extra keywords and content ratings for parental control. This intoduction just touches on the surface what it provides so I recommend reading the specification through once you understood the basics. The core concept is that the upstream project ships one extra metainfo XML file which is used to build a global application catalog called a metainfo file. Thousands of open source projects now include metainfo files, and the software center shipped in Fedora, Ubuntu and OpenSuse is now an easy to use application filled with useful application metadata. Applications without metainfo files are no longer shown which provides quite some incentive to upstream projects wanting visibility in popular desktop environments. AppStream was first introduced in 2008 and since then many people have contributed to the specification. It is being used primarily for application metadata but also now is used for drivers, firmware, input methods and fonts. There are multiple projects producing AppStream metadata and also a number of projects consuming the final XML metadata.
When applications are being built as packages by a distribution then the AppStream generation is done automatically, and you do not need to do anything other than installing a .desktop file and an metainfo.xml file in the upstream tarball or zip file. If the application is being built on your own machines or cloud instance then the distributor will need to generate the AppStream metadata manually. This would for example be the case when internal-only or closed source software is being either used or produced. This document assumes you are currently building RPM packages and exporting yum-style repository metadata for Fedora or RHEL although the concepts are the same for rpm-on-OpenSuse or deb-on-Ubuntu.
NOTE: If you are building packages, make sure that there are not two applications installed with one single package. If this is currently the case split up the package so that there are multiple subpackages or mark one of the .desktop files as NoDisplay=true. Make sure the application-subpackages depend on any -common subpackage and deal with upgrades (perhaps using a metapackage) if you’ve shipped the application before.
Summary of Package building
So the steps outlined above explains the extra metadata you need to have your application show up in GNOME Software. This tutorial does not cover how to set up your build system to build these, but both for Meson and autotools you should be able to find a long range of examples online. And there are also major resources available to explain how to create a Fedora RPM or how to build a Flatpak. You probably also want to tie both the Desktop file and the metainfo file into your i18n system so the metadata in them can be translated. It is worth nothing here that while this document explains how you can do everything yourself we do generally recommend relying on existing community infrastructure for hosting source code and packages if you can (for instance if your application is open source), as they will save you work and effort over time. For instance putting your source code into the GNOME git will give you free access to the translator community in GNOME and thus increase the chance your application is internationalized significantly. And by building your package in Fedora you can get peer review of your package and free hosting of the resulting package. Or by putting your package up on Flathub you get wide cross distribution availability.
We will here explain how you set up a Yum repository for RPM packages that provides the needed metadata. If you are making a Flatpak we recommend skipping ahead to the Flatpak section a bit further down.
Yum hosting and Metadata:
When GNOME Software checks for updates it downloads various metadata files from the server describing the packages available in the repository. GNOME Software can also download AppStream metadata at the same time, allowing add-on repositories to include applications that are visible in the the software center. In most cases distributors are already building binary RPMS and then building metadata as an additional step by running something like this to generate the repomd files on a directory of packages. The tool for creating the repository metadata is called createrepo_c and is part of the package createrepo_c in Fedora. You can install it by running the command:
dnf install createrepo_c.
Once the tool is installed you can run these commands to generate your metadata:
$ createrepo_c --no-database --simple-md-filenames SRPMS/
$ createrepo_c --no-database --simple-md-filenames x86_64/
This creates the primary and filelist metadata required for updating on the command line. Next to build the metadata required for the software center we we need to actually generate the AppStream XML. The tool you need for this is called appstream-builder. This works by decompressing .rpm files and merging together the .desktop file, the .metainfo.xml file and preprocessing the icons. Remember, only applications installing AppData files will be included in the metadata.
You can install appstream builder in Fedora Workstation by using this command:
dnf install libappstream-glib-builder
Once it is installed you can run it by using the following syntax:
$ appstream-builder --origin=yourcompanyname --basename=appstream --cache-dir=/tmp/asb-cache --enable-hidpi --max-threads=1 --min-icon-size=32 --output-dir=/tmp/asb-md --packages-dir=x86_64/ --temp-dir=/tmp/asb-icons
This takes a few minutes and generates some files to the output directory. Your output should look something like this:
Scanning packages...
Processing packages...
Merging applications...
Writing /tmp/asb-md/appstream.xml.gz...
Writing /tmp/asb-md/appstream-icons.tar.gz...
Writing /tmp/asb-md/appstream-screenshots.tar...Done!
The actual build output will depend on your compose server configuration. At this point you can also verify the application is visible in the yourcompanyname.xml.gz file.
We then have to take the generated XML and the tarball of icons and add it to the repomd.xml master document so that GNOME Software automatically downloads the content for searching.
This is as simple as doing:
modifyrepo_c --no-compress --simple-md-filenames /tmp/asb-md/appstream.xml.gz x86_64/repodata/
modifyrepo_c --no-compress --simple-md-filenames /tmp/asb-md/appstream-icons.tar.gz x86_64/repodata/
Deploying this metadata will allow GNOME Software to add the application metadata the next time the repository is refreshed, typically, once per day. Hosting your Yum repository on Github Github isn’t really set up for hosting Yum repositories, but here is a method that currently works. So once you created a local copy of your repository create a new project on github. Then use the follow commands to import your repository into github.
cd ~/src/myrepository
git init
git add -A
git commit -a -m "first commit"
git remote add origin git@github.com:yourgitaccount/myrepo.git
git push -u origin master
Once everything is important go into the github web interface and drill down in the file tree until you find the file called ‘repomd.xml’ and click on it. You should now see a button the github interface called ‘Raw’. Once you click that you get the raw version of the XML file and in the URL bar of your browser you should see a URL looking something like this:
https://raw.githubusercontent.com/cschalle/hubyum/master/noarch/repodata/repomd.xml
Copy that URL as you will need the information from it to create your .repo file which is what distributions and users want in order to reach you new repository. To create your .repo file copy this example and edit it to match your data:
[remarkable]
name=Remarkable Markdown editor software and updates
baseurl=https://raw.githubusercontent.com/cschalle/hubyum/master/noarch
gpgcheck=0
enabled=1
enabled_metadata=1
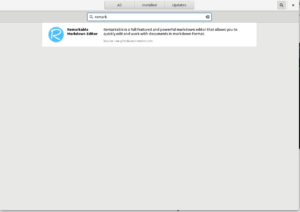
So on top is your Repo shortname inside the brackets, then a name field with a more extensive name. For the baseurl paste the URL you copied earlier and remove the last bits until you are left with either the ‘norach’ directory or your platform directory for instance x86_64. Once you have that file completed put it into /etc/yum.repos.d on your computer and load up GNOME Software. Click on the ‘Updates’ button in GNOME Software and then on the refresh button in the top left corner to ensure your database is up to date. If everything works as expected you should then be able to do a search in GNOME software and find your new application showing up.
Flapak hosting and Metadata
The flatpak-builder binary generates AppStream metadata automatically when building applications if the appstream-compose tool is installed on the flatpak build machine. Flatpak remotes are exported with a separate ‘appstream’ branch which is automatically downloaded by GNOME Software and no addition work if required when building your application or updating the remote. Adding the remote is enough to add the application to the software center, on the assumption the AppData file is valid.
AppStream files allow us to build a modern software center experience either using distro packages with yum-style metadata or with the new flatpak application deployment framework. By including a desktop file and AppData file for your Linux binary build your application can be easily found and installed by end users greatly expanding its userbase.

