Veeam Backup for Microsoft Azure: configure Azure – pt.1

Veeam Backup for Microsoft Azure is a standalone solution specifically designed to backup Azure workloads within Azure only and requires a specific configuration for some Azure’s objects.
Before installing Veeam Backup for Microsoft Azure, your Azure environment needs to be configured accordingly to meet the prerequisites.
Blog Series
Veeam Backup for Microsoft Azure: configure Azure – pt.1
Veeam Backup for Microsoft Azure: installation – pt.2
Veeam Backup for Microsoft Azure: configuration – pt.3
Veeam Backup for Microsoft Azure: backup and restore policies – pt.4
Veeam Backup for Microsoft Azure
Specifically designed for the Azure environment, the software creates image-level backups and stores the data in the container configured in the selected Azure Storage Account.
The following operations can be performed with VBA to restore backed up data:
- Restore of entire Microsoft Azure VMs
- Restore of virtual disks of Microsoft Azure VMs
- Restore of Microsoft Azure VMs guest OS files and folders
Because backups are created in native Veeam format, you can copy the Azure VMs backup on-premises using Veeam Backup & Replication and perform data migration between cloud infrastructures if required.
Permissions
- Permissions for Azure Service Accounts – the software uses a service account to establish and maintain a connection to Microsoft Azure.
- Permissions for Repository Accounts – a repository account is used to establish and maintain a connection to Microsoft Azure storage accounts.
Licensing
Veeam Backup for Microsoft Azure is licensed per protected Microsoft Azure VM. If a VM has a restore point (snapshot or backup) created in the past 31 days it is considered protected and consumes 1 license unit. Azure VMs with manually created snapshots are not considered protected instead and don’t consume license units.
The product supports the following license types:
- Free License – you can protect up to 10 Azure VMs. If these VMs have not been backed-up within the last 31 days, VBA revokes the license.
- BYOL License – the number of VMs you can protect depends on the purchased number of allowed instances. If the protected VMs exceed the counter of a BYOL license, exceeding VMs are backed up for the next 30 days then the backup is no longer processed.
Configure Azure environment
To deploy Veeam Backup for Azure, the Azure environment needs to be prepared by configuring all the components required to run the software.
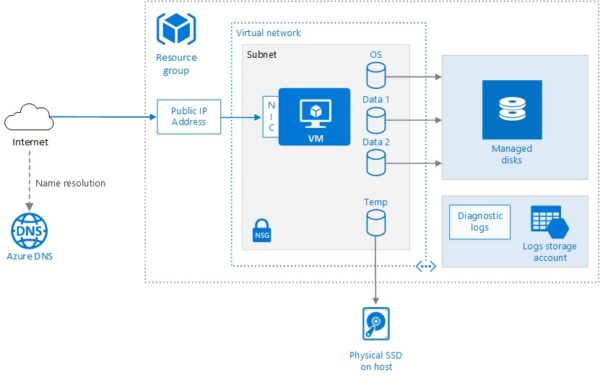
Three main objects needs to be configured in Azure:
- Resource Group
- Virtual Network
- Storage Account
Configure the Resource Group
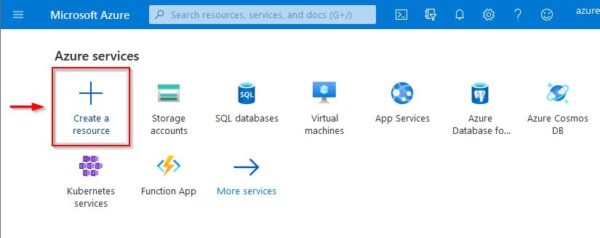
Login to the Azure portal and access your Azure configuration area. Click Create a resource under Azure services.
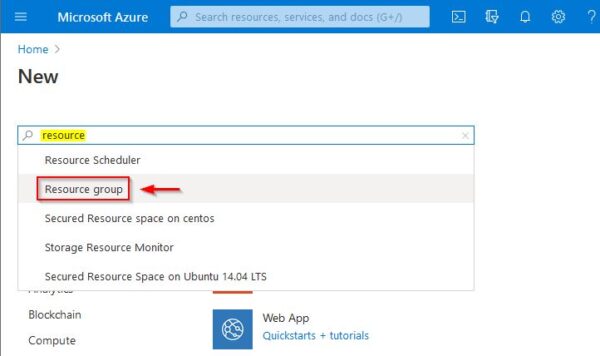
In the search box type resource to quickly find the object to configure then select Resource group from the list.
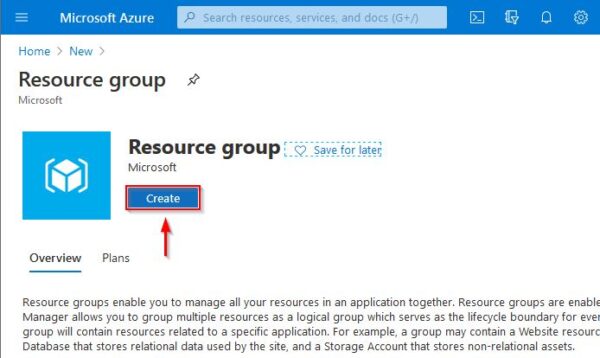
Click on Create button.
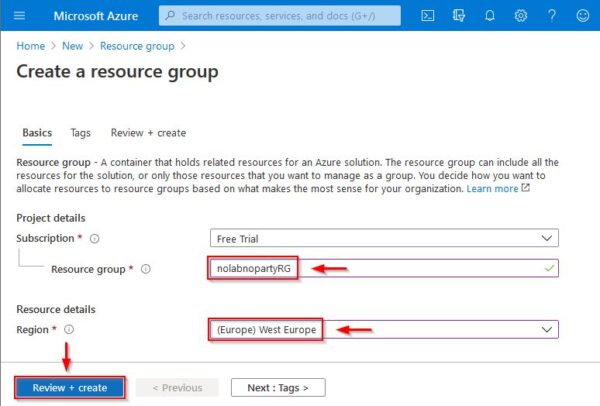
Enter a Resource group name and select the Region from the drop-down menu. Click Review + create to validate.
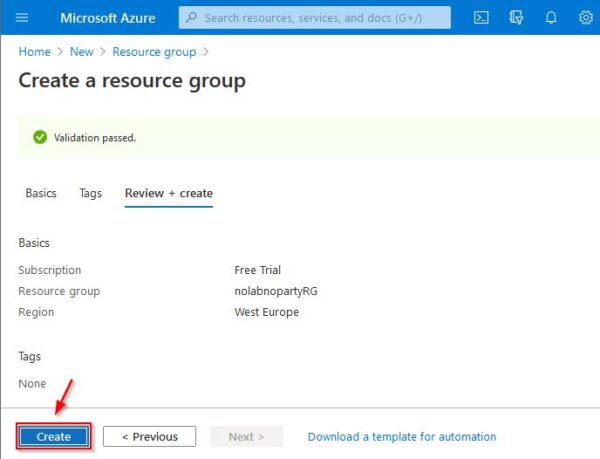
When the validation process has been completed, click Create button to actually create the Resource Group.
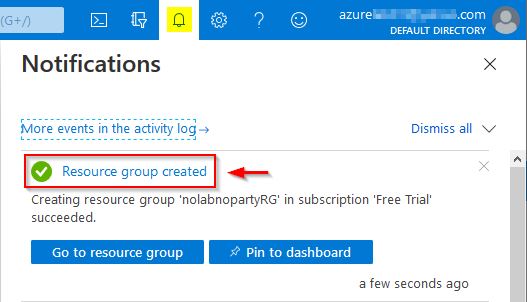
After few seconds the Resource Group object is created in Azure.
Create the Virtual Network
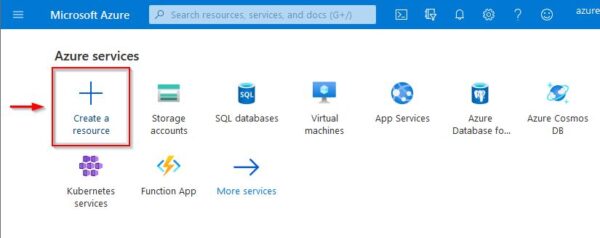
In the configuration area click Create a resource under Azure services.
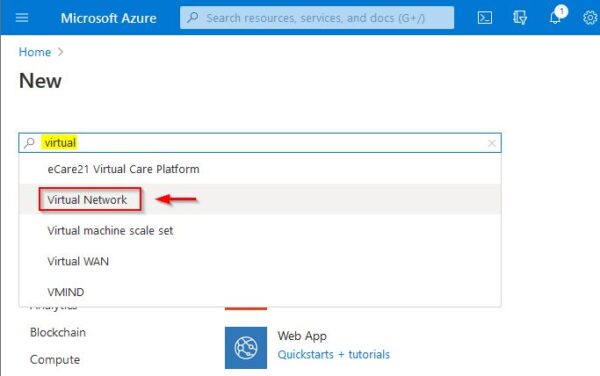
In the search box type virtual to quickly find the object to configure then select Virtual Network.
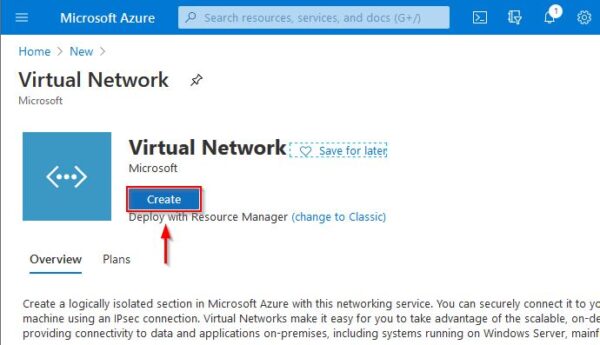
Click Create.
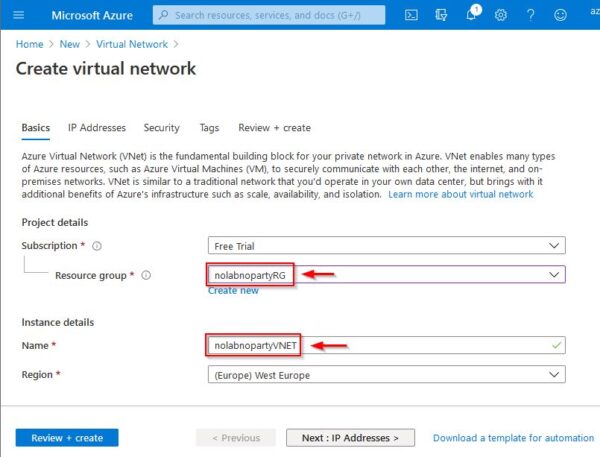
In the Basics tab, select from the Resource group drop-down menu the object previusly created. Enter the Name for the virtual network. Click Next : IP addresses > to continue.
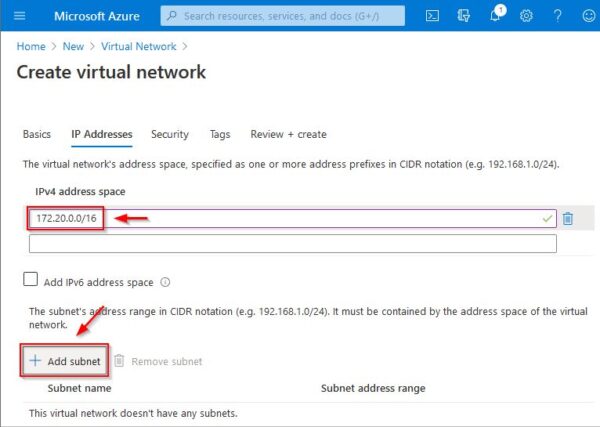
Select IP Addresses tab and specify the IPv4 address space to use. Click Add subnet to specify the subnet to use.
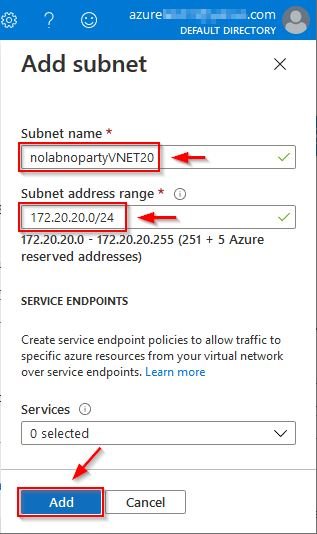
Enter the Subnet name and specify the Subnet address range to use for this virtual network. Click Add to create the virtual network object.
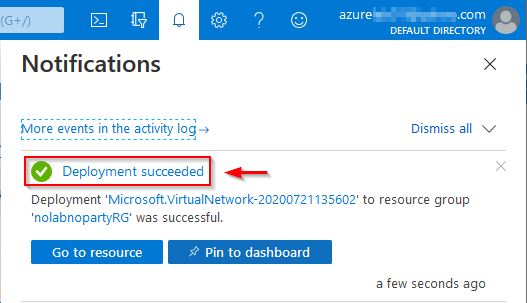
After few seconds also the new object is deployed in Azure.
Create the Storage Account
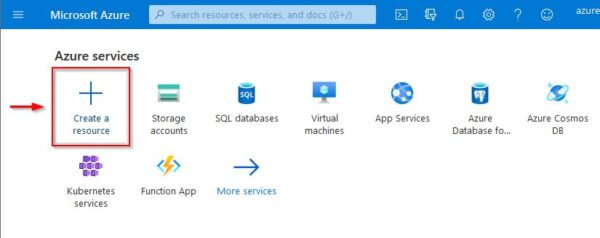
Again, in the configuration area click Create a resource under Azure services.
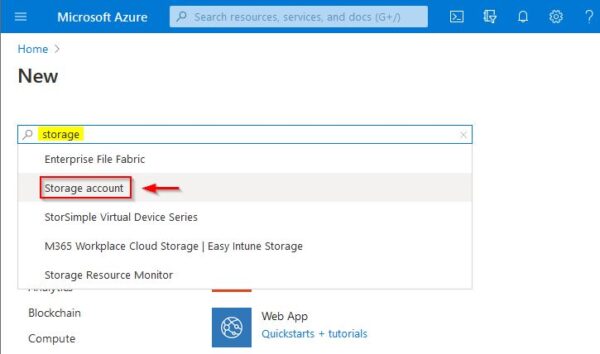
In the search box type storage to find the object to configure then select Storage Account from the list.
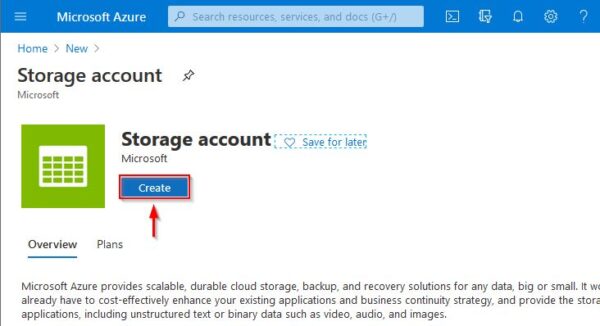
Click Create.
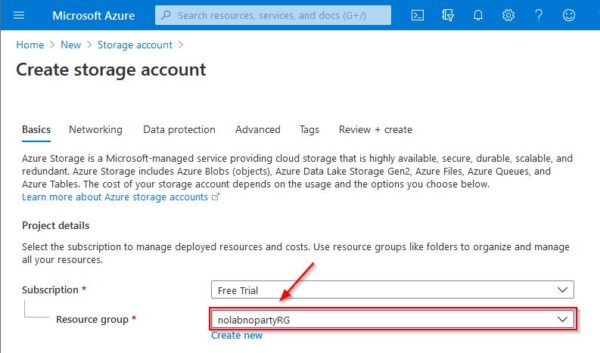
From Basics tab, select the Resource group previously created from the drop-down menu.
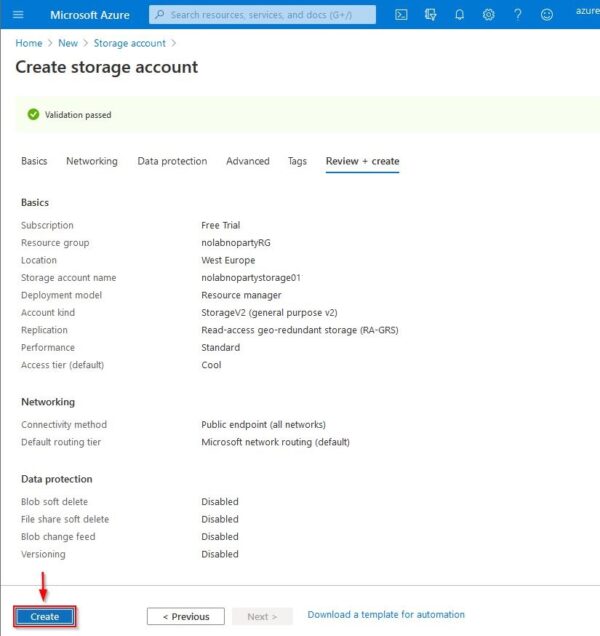
Assign the Storage account name and specify the Location to use. Click Review + create to validate.
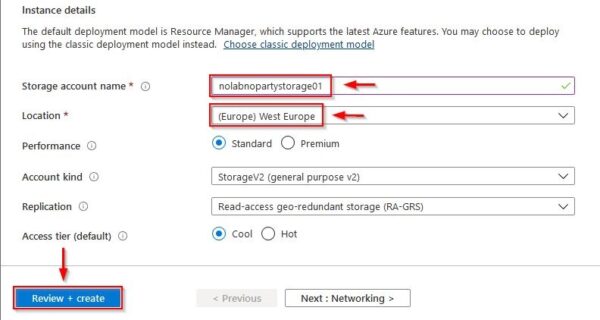
Once validated, click Create.
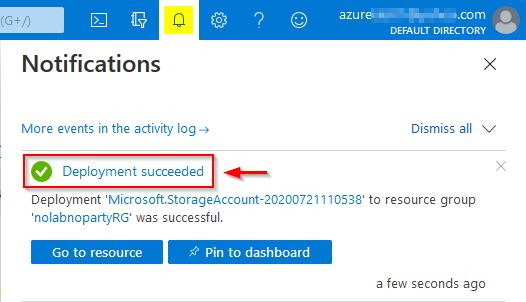
After few seconds the Storage Account object is deployed in Azure.
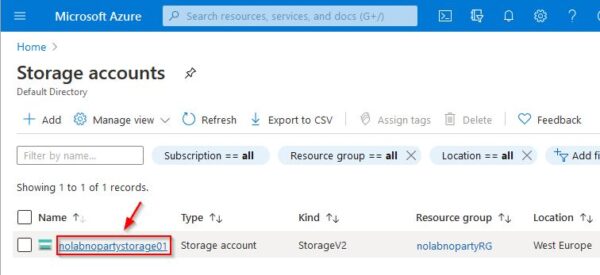
From Home > Storage accounts select the just created object.
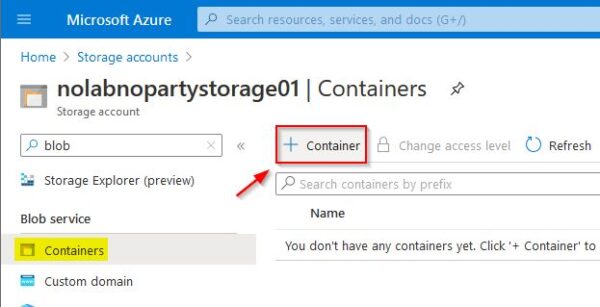
In the search box type blob to find the correct service to use. Select Containers from the list.
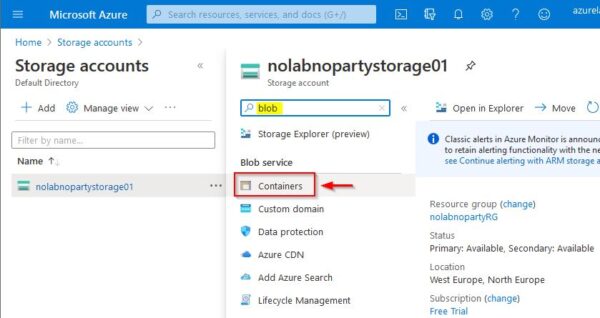
Click Container to create the new object storage where Veeam backups will be stored.
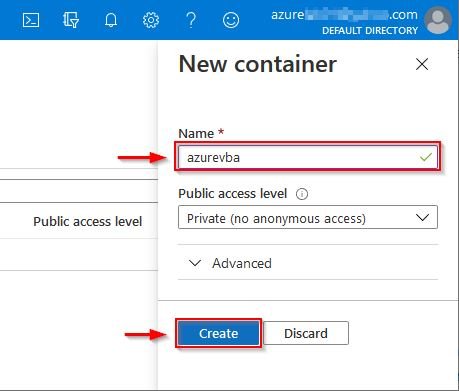
Enter the Name of the container and click Create.
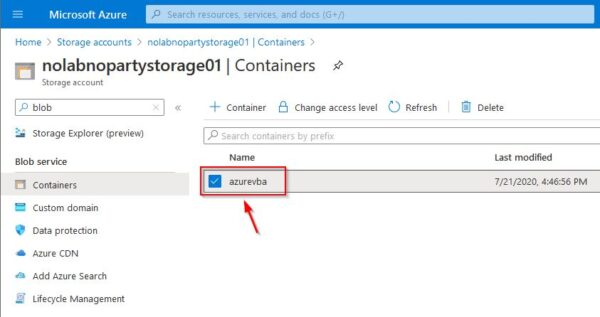
The new container has been created successfully for the selected Storage Account.
The Azure environment is now configured with all objects required to run Veeam Backup for Microsoft Azure.
Part 2 will show the detailed installation procedure of Veeam Backup for Microsoft Azure.


